
Ink & Algorithms
How I Redesigned My Desk Setup Under $500 (Step-by-Step)
My desk used to feel cluttered, uncomfortable, and honestly uninspiring. Cables were everywhere, my posture was terrible, and working long hours felt exhausting. 😩
Like most people, I thought creating a clean and productive desk setup would cost thousands of dollars. Every YouTube setup tour looked expensive and unrealistic.
So I challenged myself: redesign my entire desk setup for under $500 using only practical tech upgrades that would genuinely improve productivity, comfort, and aesthetics. In this tutorial, I’ll walk you through every upgrade, why I chose it, and how each one transformed my workspace.
💻 What My Desk Setup Looked Like Before
Before I upgraded my workspace, my desk setup was the definition of “good enough.” It technically worked, but it definitely didn’t help me stay productive, focused, or comfortable during long work sessions.
Like a lot of people working from home, I slowly collected random desk accessories over time without thinking about ergonomics, cable management, or workflow efficiency. The result? A cluttered desk that looked messy, felt uncomfortable, and made work more stressful than it needed to be.

🤦♂️ The Biggest Problems With My Old Desk Setup
1. Cable Clutter Was Completely Out of Control
My desk had charging cables, USB adapters, and random wires everywhere. Every time I needed to plug something in, I had to untangle a mess behind the desk.
Not only did it look bad, but it also made the entire workspace feel distracting and unorganized. Once I started researching minimalist desk setup ideas, I realized cable management alone could completely change the look and feel of a workspace.
2. My Posture Was Terrible
I spent hours every day looking down at my laptop screen. After long work sessions, my neck and shoulders were constantly stiff.
At first, I ignored it because I thought ergonomic desk accessories were unnecessary. But over time, the discomfort started affecting my focus and productivity.
The biggest issue was screen height. My laptop sat too low, which forced me into a terrible posture all day. That’s when I realized a simple laptop stand could make a massive difference without spending a fortune.
3. My Mouse and Keyboard Felt Cheap
This was probably the biggest productivity killer. I was using a basic office mouse and a flat laptop keyboard that felt uncomfortable after a few hours. Scrolling wasn’t smooth, typing felt cramped, and everything about the setup felt uninspiring.
I didn’t realize how much better a proper productivity mouse and mechanical keyboard could feel until I upgraded.
4. My Desk Lighting Was Bad
I relied mostly on overhead room lighting, which created harsh shadows and made my workspace feel dull at night. I wanted a setup that felt cozy, modern, and easier on my eyes - especially for evening work sessions.
5. The Entire Setup Felt Visually Stressful
Even when the desk was technically “clean,” it still looked chaotic. Nothing matched. Nothing felt intentional.
And honestly, it made sitting down to work less enjoyable.
I wanted a clean desk setup that felt:
Minimalist
Comfortable
Organized
Productivity-focused
More motivating to use every day
That became the goal for this entire desk makeover.
What I Wanted From My New Desk Setup
Instead of chasing an expensive Pinterest-style setup, I focused on practical upgrades that would actually improve my daily workflow.
My priorities were simple:
Better ergonomics
Cleaner cable management
Improved lighting
More comfortable typing
A modern minimalist desk aesthetic
Better productivity without overspending
Most importantly, I wanted to prove you don’t need a $2,000 setup to create a workspace that feels premium.
And honestly, a few smart tech upgrades made a much bigger difference than I expected.
If your current workspace feels cluttered, uncomfortable, or outdated, even small changes can completely transform how your desk looks and functions.
Quick Takeaway Before the Upgrades
The biggest lesson I learned is this: A productive desk setup isn’t about buying the most expensive gear. It’s about removing friction from your daily workflow.
Fixing posture, reducing clutter, improving lighting, and upgrading the tools you touch every day can dramatically improve your focus and comfort.
That’s exactly where these desk setup upgrades started making a real difference.
💰 My Desk Setup Budget Breakdown
When I started planning this budget desk setup upgrade, I didn’t want to waste money on trendy gadgets that looked good but didn’t actually improve my workflow. Instead, I focused on high-impact tech accessories that solved real problems like cable clutter, poor ergonomics, bad lighting, and uncomfortable typing.
Most of my budget went toward productivity upgrades I use every single day - a better mouse, mechanical keyboard, laptop stand, and cleaner cable management system. I also mixed affordable desk accessories with a few premium upgrades that made the workspace feel dramatically more organized and comfortable without going over the $500 limit.
The biggest surprise was how much even small changes improved my focus, posture, and overall desk aesthetics. If you’re building a work-from-home setup or upgrading your home office on a budget, prioritizing practical accessories over flashy gear makes a much bigger difference in daily productivity.
📋 Table Of Contents
Disclaimer: Prices are accurate at the time of publishing but are subject to change. By hunting for sales, buying refurbished, or prioritizing the upgrades you need most, you can easily build this setup under budget.
1️⃣ Step 1 - Upgrade the Mouse for Better Productivity
Out of every upgrade in my desk setup, switching to a proper productivity mouse made the biggest day-to-day difference almost immediately.
At first, I didn’t think a mouse could really impact workflow that much. I was using a cheap basic mouse that technically worked, but after long work sessions, my wrist felt sore, scrolling through documents was annoying, and multitasking felt slower than it should have been.
That changed the moment I upgraded to a more ergonomic wireless productivity mouse.
🚀 The Upgrade That Made the Biggest Difference
Out of every tech upgrade in my desk setup makeover, the Logitech MX Master 3S was easily the one that changed my daily workflow the most.
I originally thought upgrading a mouse would be a minor improvement. But after using this productivity mouse for a few days, I realized how much my old setup was slowing me down without me noticing.
Everything - scrolling, multitasking, navigating between apps, and even basic desk comfort - immediately felt smoother and more efficient.
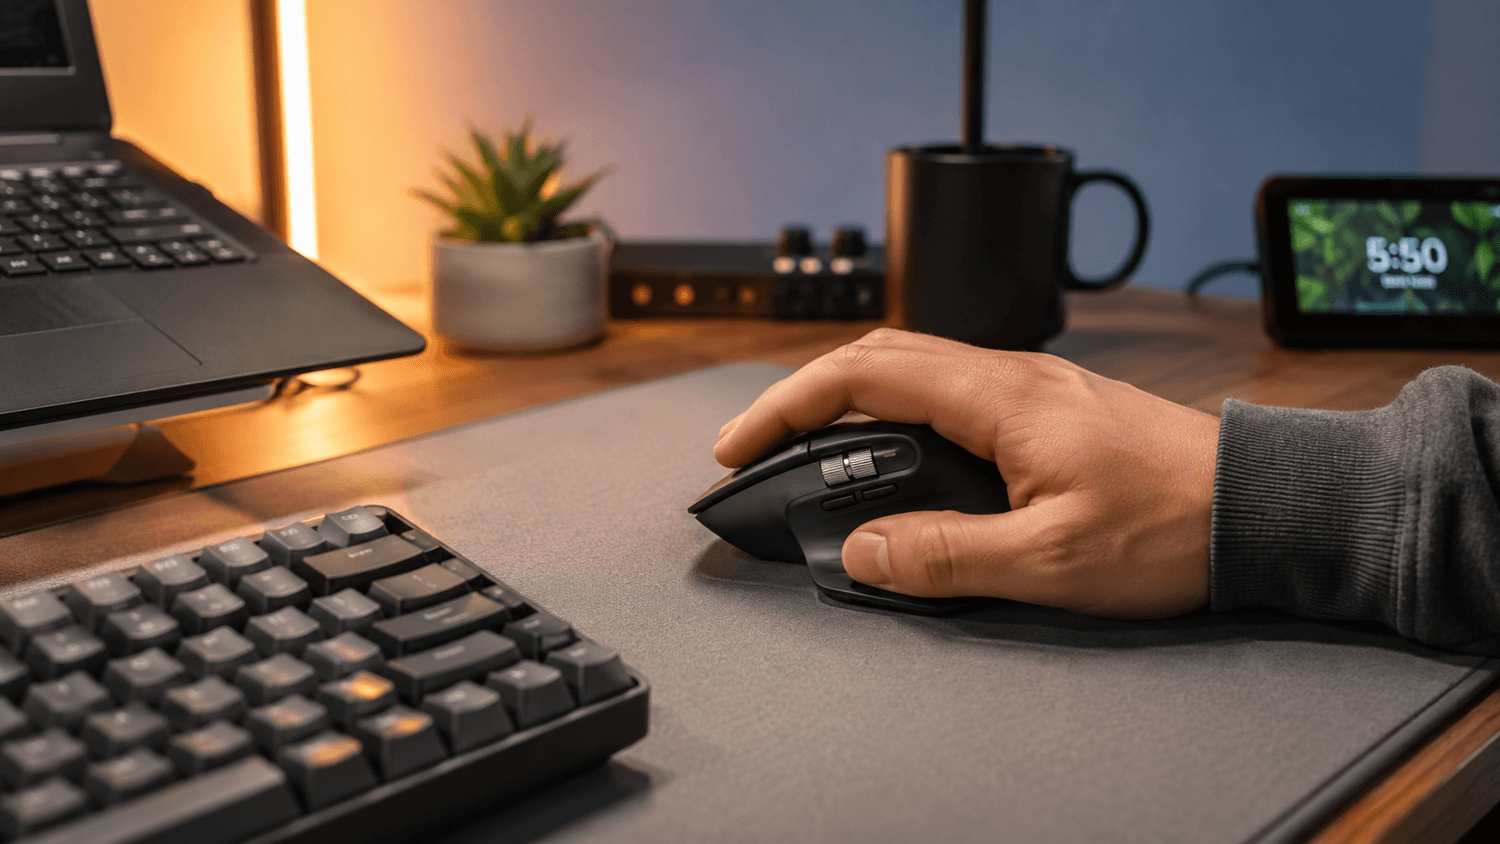
What made the biggest difference:
Ergonomic design reduced wrist fatigue
Ultra-fast scrolling saved time daily
Quiet clicks made late-night work more enjoyable
Multi-device support simplified my workflow
Precision tracking worked perfectly on almost any surface
Yes, it’s a bit of an investment, but it’s the one tool you touch 8 hours a day, making it the most important value-for-money purchase in this entire list.
2️⃣ Step 2 - Replace the Keyboard With Something You Actually Enjoy Using
After upgrading my mouse, the next thing that immediately made my desk setup feel better was replacing my old keyboard.
I didn’t realize how much time I spend typing every single day until I upgraded to a proper mechanical keyboard. Emails, coding, writing, editing, browsing, shortcuts - almost everything on a computer starts with the keyboard.
And honestly, my old setup made typing feel boring and uncomfortable.
⌨️ Why Mechanical Keyboards Feel Better for Work
Before upgrading my desk setup, I never understood why so many people recommended mechanical keyboards for productivity and work-from-home setups.
I assumed they were mostly for gamers.
But after switching to the Keychron K2 wireless mechanical keyboard, I quickly realized a good keyboard can completely change how your workspace feels every single day.
Typing became faster, smoother, more comfortable, and honestly a lot more enjoyable.
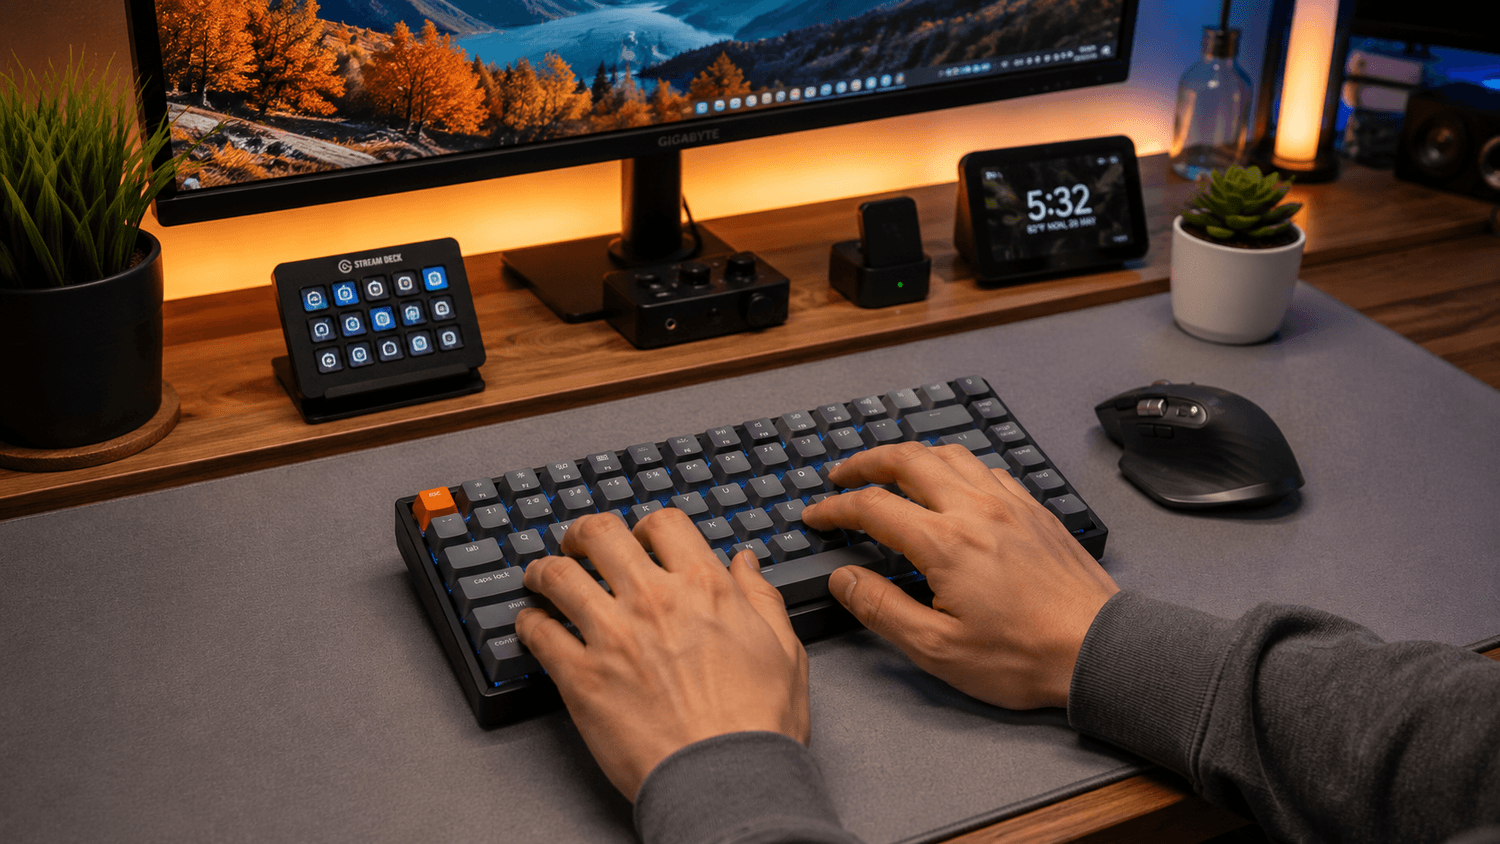
The biggest thing you notice with a mechanical keyboard is the typing feel.
Unlike flat laptop keyboards or cheap office keyboards, mechanical switches provide:
Better tactile feedback
Smoother key presses
Faster response
More consistent typing
Less finger fatigue during long sessions
It’s one of those upgrades that makes work feel less frustrating immediately.
Whether you’re writing, coding, editing, studying, or answering emails all day, a better keyboard genuinely improves the experience.
3️⃣ Step 3 - Fix Bad Posture With a Laptop Stand
Out of all the affordable desk setup upgrades I added, a laptop stand was probably the most underrated.
Before this upgrade, I spent hours every day looking down at my laptop screen without realizing how much strain it was putting on my neck and shoulders. My posture was terrible, my desk felt cramped, and long work sessions became uncomfortable faster than they should have.
I honestly thought I needed an expensive ergonomic office setup to fix the problem.
Turns out, I just needed to raise my screen to the correct height.
💰 The Budget Upgrade That Instantly Improved Comfort
Out of every affordable desk setup upgrade I added, the laptop stand was probably the one that delivered the biggest comfort improvement for the lowest cost.
Before this, my laptop sat flat on the desk all day, forcing me to constantly look downward while working. After a few hours, my neck and shoulders would feel stiff, and long work sessions became uncomfortable faster than they should have.
I honestly thought I needed an expensive ergonomic office setup to fix the problem.
Instead, a simple adjustable laptop stand completely changed how my workspace felt.
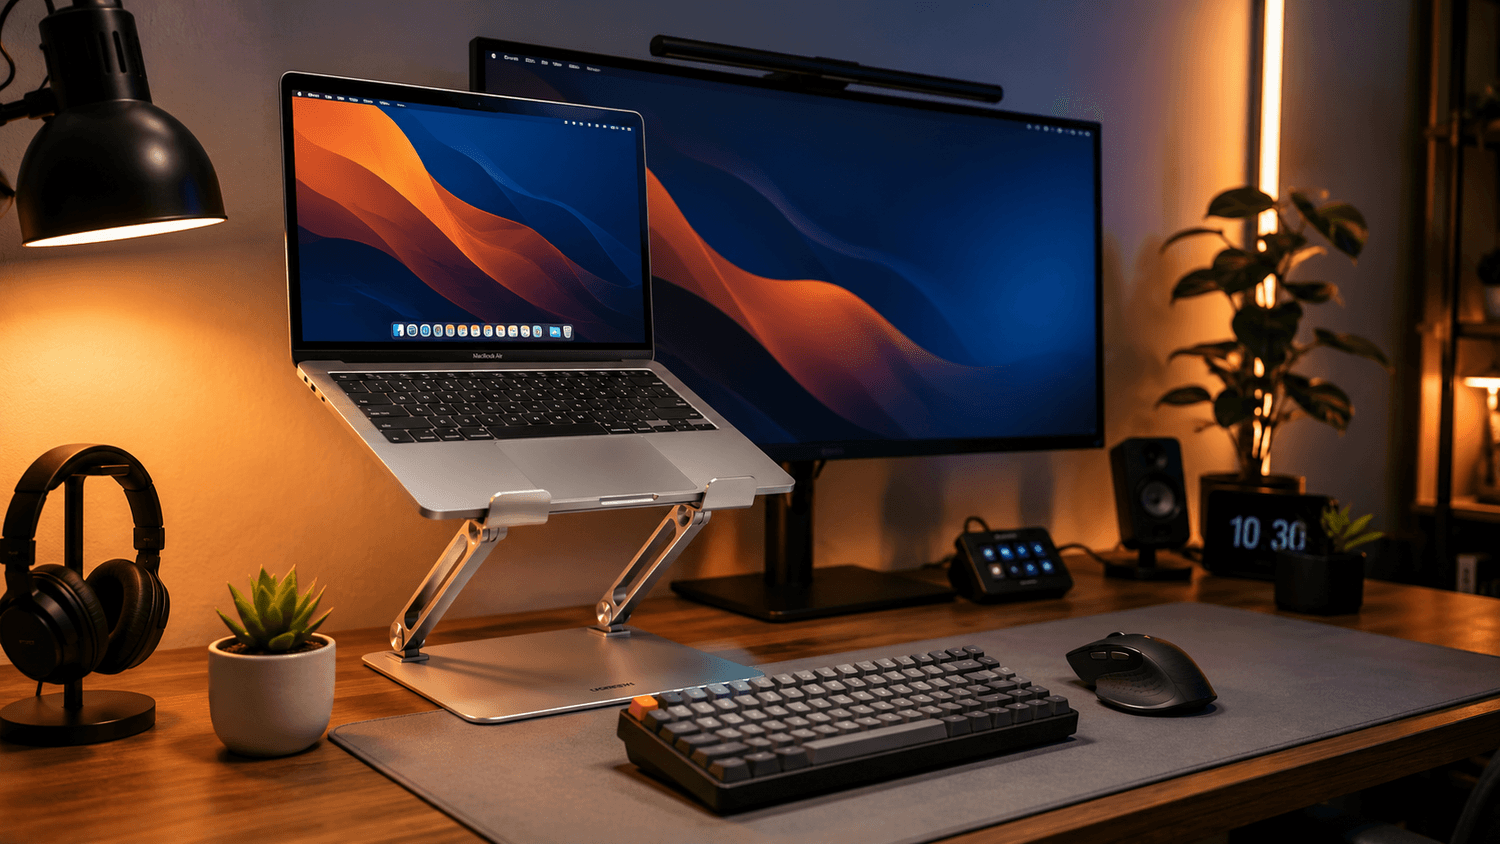
What I liked most about the UGREEN laptop stand was the flexibility.
The adjustable viewing height made it easy to customize the setup for:
Writing
Coding
Video calls
Studying
Content creation
Everyday browsing
Even small ergonomic changes made a noticeable difference in daily comfort.
The stand also created a more natural viewing angle, which helped reduce the constant downward head position that causes neck pain over time.
4️⃣ Step 4 - Eliminate Cable Chaos With a USB-C Hub
One of the fastest ways to make a desk setup feel messy is cable clutter.
Before upgrading my workspace, I constantly dealt with adapters, charging cables, external drives, and random dongles scattered across the desk. Every time I needed to plug something in, it turned into a frustrating mess of disconnecting devices and hunting for available ports.
It made the entire setup feel cramped and disorganized.
That’s when I realized a good USB-C hub isn’t just a convenience upgrade - it’s one of the easiest ways to completely simplify a desk setup.
🔌 The One-Cable Setup That Changed Everything
One of the most frustrating parts of my old desk setup was constantly dealing with cables, adapters, and missing ports.
Every time I sat down to work, I had to reconnect accessories, swap dongles, and figure out where everything plugged in. My workspace looked messy, and the entire setup felt more complicated than it needed to be.
That completely changed once I added a proper USB-C docking station.
Honestly, this ended up being one of the most underrated productivity upgrades in the entire desk makeover.
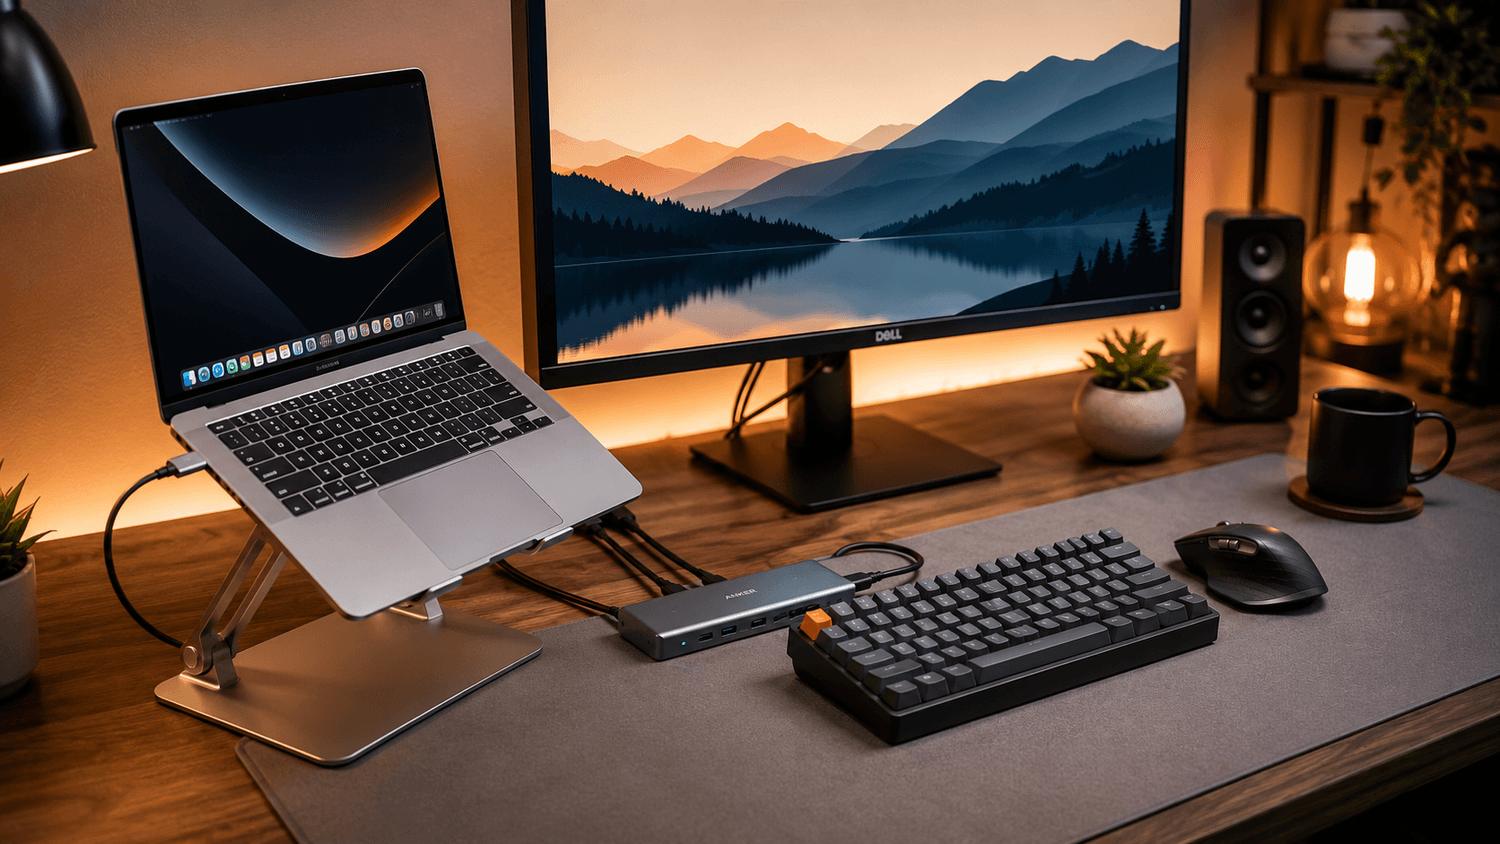
The moment I connected everything through the Anker 11-in-1 USB-C Hub, my desk setup instantly felt cleaner and more professional.
Instead of plugging accessories directly into the laptop one by one, everything connected through a single compact hub.
That single-cable setup made a huge difference:
Cleaner workspace
Faster device setup
Better cable management
Easier multitasking
Less clutter on the desk
It honestly made the entire workstation feel more organized overnight.
5️⃣ Step 5 - Improve Lighting for Better Focus and Aesthetics
One of the biggest changes in my desk setup had nothing to do with performance specs or productivity gadgets.
It was lighting.
Before upgrading the lighting in my workspace, my desk felt dull during the day and harsh at night. I relied mostly on overhead room lights, which created glare on the screen, deep shadows around the desk, and a workspace that honestly felt exhausting to sit at for long periods.
The moment I added proper desk lighting, the entire setup felt calmer, cleaner, and dramatically more enjoyable to use.
✨ The Lighting Upgrade That Made My Setup Look Premium
I expected better lighting to improve visibility.
I didn’t expect it to completely change how my desk setup looked and felt.
Out of every upgrade in my under-$500 desk setup makeover, the monitor light bar was the one that instantly made the workspace feel cleaner, more modern, and surprisingly premium.
Once I added the BenQ ScreenBar Pro above my monitor, the entire setup went from “basic work desk” to a workspace that actually felt enjoyable to sit at every day.
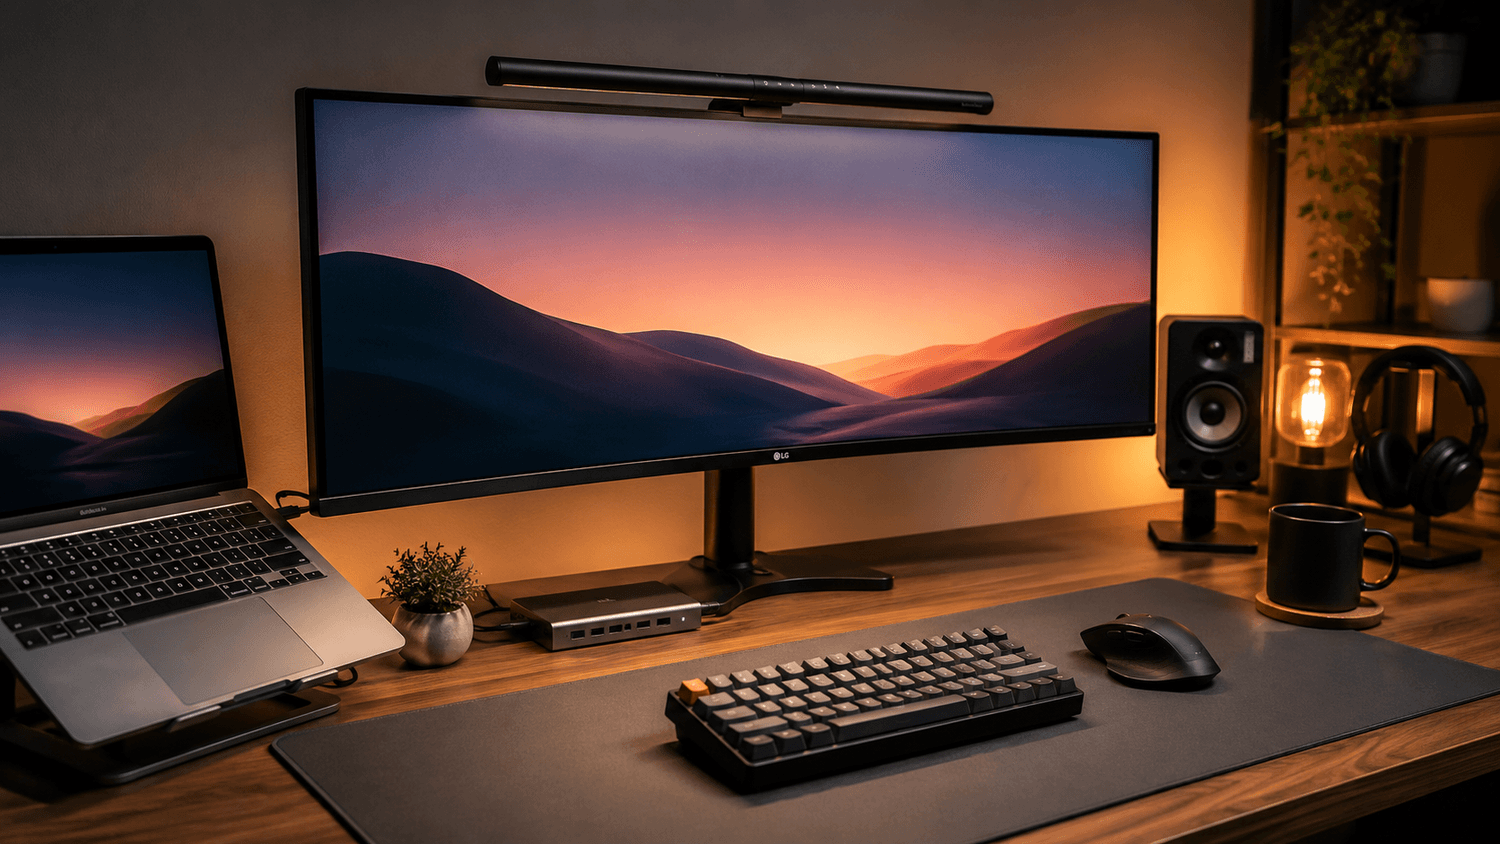
Unlike a traditional desk lamp, the BenQ ScreenBar Pro mounts directly on top of the monitor and shines light downward across the desk without reflecting on the screen.
That single change immediately improved:
Workspace visibility
Eye comfort
Desk organization visibility
Overall desk aesthetics
Focus during long work sessions
The asymmetrical lighting design was the real game changer.
Instead of blasting light into my eyes or creating glare on the monitor, it illuminated only the workspace itself. The result felt softer, cleaner, and much easier on the eyes.
6️⃣ Step 6 - Add a Desk Mat to Make the Setup Feel Complete
This was the upgrade I almost skipped.
At first, a desk mat felt like one of those “nice-to-have” accessories that only improves aesthetics. But after adding one to my setup, I realized it completely changed how the desk felt to use every single day.
It instantly made the workspace look cleaner, more organized, and surprisingly more premium - even though it was one of the cheapest upgrades in the entire setup.
🤝 The Minimalist Upgrade That Tied Everything Together
Out of every upgrade in my desk setup makeover, this was the one that made the entire workspace finally feel complete.
Not the keyboard.
Not the monitor light.
Not even the ergonomic mouse.
It was the desk mat.
Adding the Orbitkey Desk Mat instantly transformed the setup from “a collection of gadgets” into a clean, cohesive workspace that actually felt intentional.
And surprisingly, it improved both productivity and organization more than I expected.
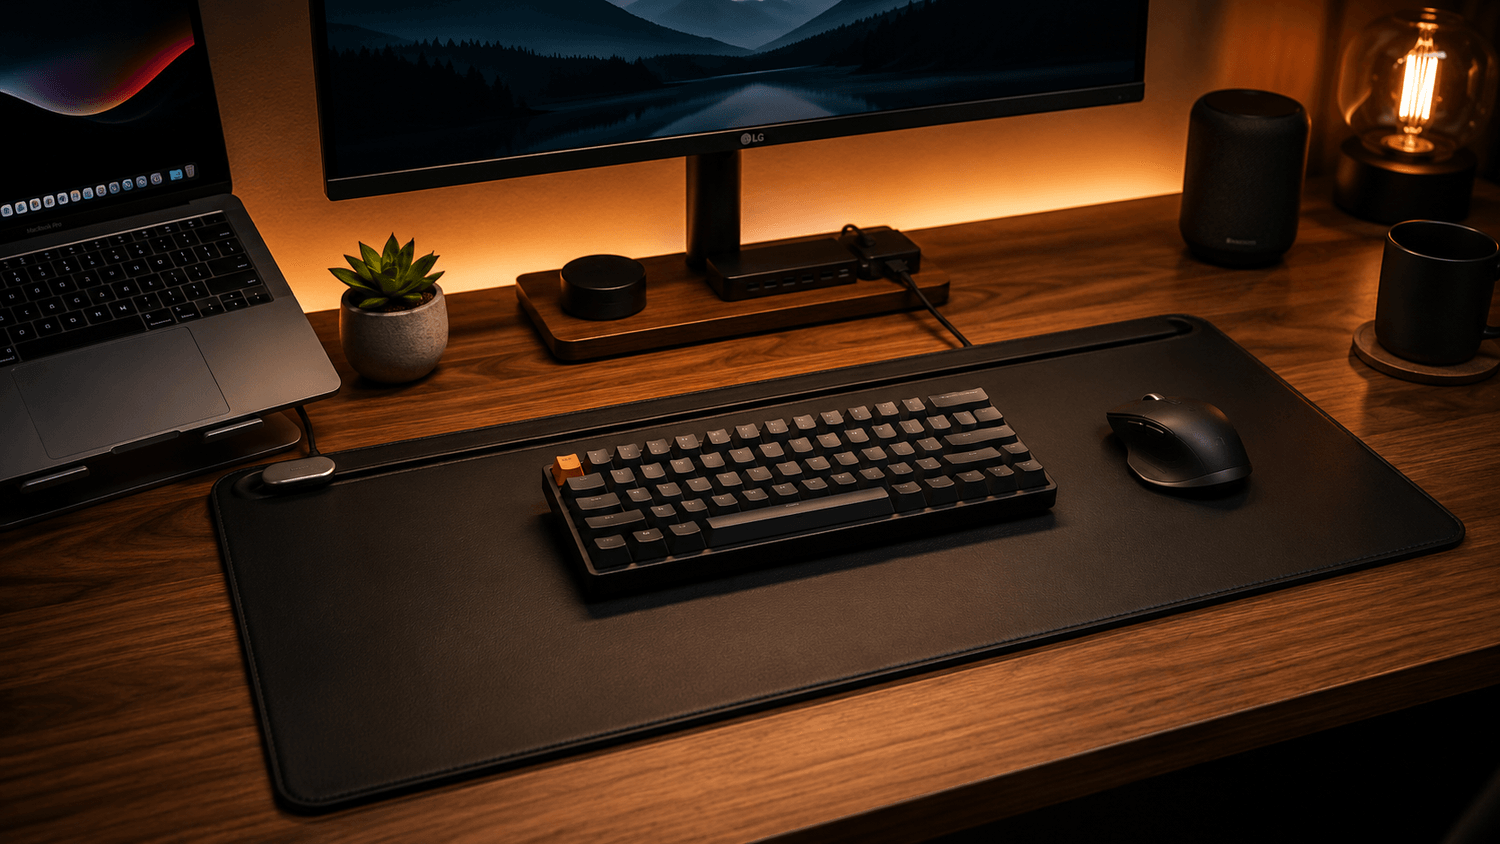
The biggest change was how organized the desk suddenly looked.
The large desk mat created a dedicated workspace zone that visually separated:
The keyboard
Mouse
Accessories
Charging cables
Everyday work essentials
That simple layer made the setup feel:
Cleaner
More minimal
More premium
More focused
More intentional
For minimalist desk setups, this kind of visual structure makes a huge difference.
7️⃣ Step 7 - Fix Small Annoyances With Magnetic Cable Holders
After upgrading my keyboard, mouse, lighting, and monitor setup, one tiny problem still kept ruining the clean desk aesthetic: cables constantly sliding off the desk.
It sounds minor, but loose charging cables, USB cords, and headphone wires can make even the best desk setup feel messy. I was tired of reaching behind the desk every time a cable disappeared or dealing with tangled cords during work sessions.
That’s when I added a simple magnetic cable holder - and honestly, it solved one of the most annoying parts of my workspace.
🚀 The Tiny Upgrade That Had a Huge Impact
Out of every desk setup upgrade I made, this might have been the smallest - but it fixed one of the most frustrating daily problems instantly.
Before adding magnetic cable holders, my desk constantly looked messy. Charging cables slipped behind the desk, USB cords tangled together, and I wasted way too much time reaching around trying to find the right cable.
It didn’t matter how clean the rest of the workspace looked. Loose wires always made the setup feel unfinished.
That changed the moment I added magnetic cable organizers.
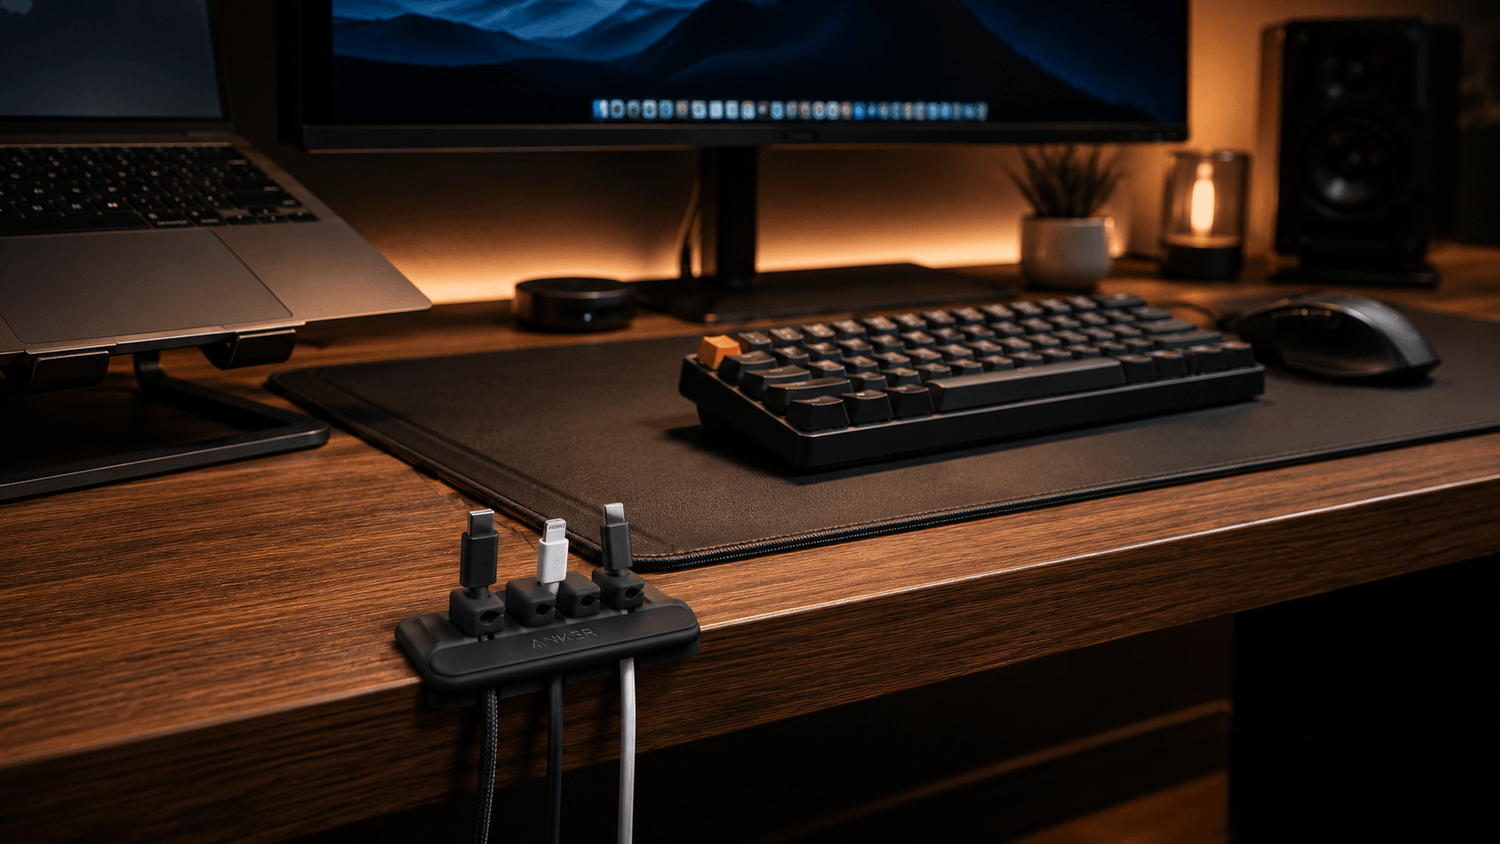
A good cable management setup makes your workspace feel cleaner, more organized, and easier to use every single day.
The Anker magnetic cable holders I used attached easily to the desk and kept my most-used cables locked neatly in place. No more cables falling to the floor or getting buried behind the monitor.
What I liked most:
Keeps charging cables within reach
Reduces desk clutter instantly
Works with USB-C, Lightning, and other cables
Easy to reposition when changing desk layouts
Helps create a cleaner minimalist desk setup
For such a small accessory, the difference was surprisingly noticeable.
8️⃣ Step 8 - Add a Productivity Control Center
After fixing my desk ergonomics, lighting, and cable management, I realized there was still one thing slowing me down: constantly switching apps, adjusting audio, opening folders, and repeating small tasks all day long. Those tiny interruptions added up fast. That’s when I decided to add a compact productivity control center to my desk setup - and it completely changed how efficient my workflow felt.
Instead of relying on endless keyboard shortcuts or clicking through menus, I added a programmable desktop controller that put my most-used actions one tap away. It instantly made my workspace feel more streamlined, organized, and creator-focused.
💼 The Upgrade That Made My Desk Feel “Pro”
Out of every upgrade in my budget desk setup, this was the one that completely changed the vibe of my workspace. Adding the Elgato Stream Deck MK.2 instantly made my desk feel more like a professional creator setup instead of just another work-from-home station.
At first, I thought it was mainly for streamers and YouTubers. But after using it for a few days, I realized it’s actually one of the best productivity tools for anyone who spends hours at a computer.
Whether you’re working remotely, editing videos, coding, designing, attending meetings, or multitasking between apps all day, having customizable macro keys right on your desk is a game changer.
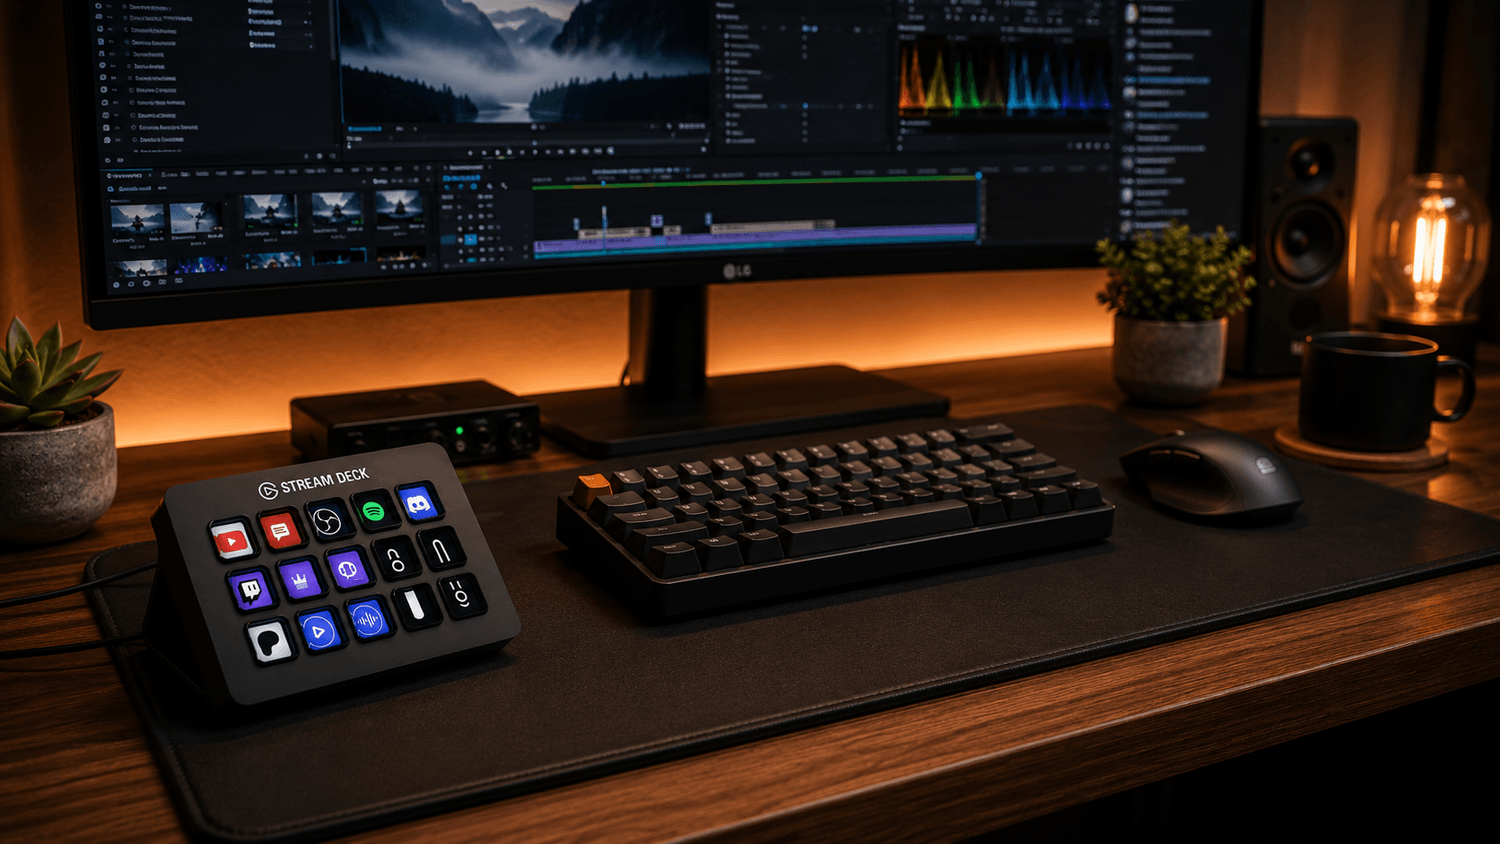
The biggest benefit wasn’t just convenience - it was speed and focus.
Instead of constantly switching tabs, searching menus, or memorizing keyboard shortcuts, I could trigger actions instantly with one tap.
I set mine up to:
Launch productivity apps
Mute and unmute my microphone
Control Spotify and volume
Open folders and work dashboards
Trigger OBS recording scenes
Start Zoom or Teams meetings
Toggle smart lights and focus modes
Run multi-step macros automatically
Those small workflow improvements added up fast during long work sessions.
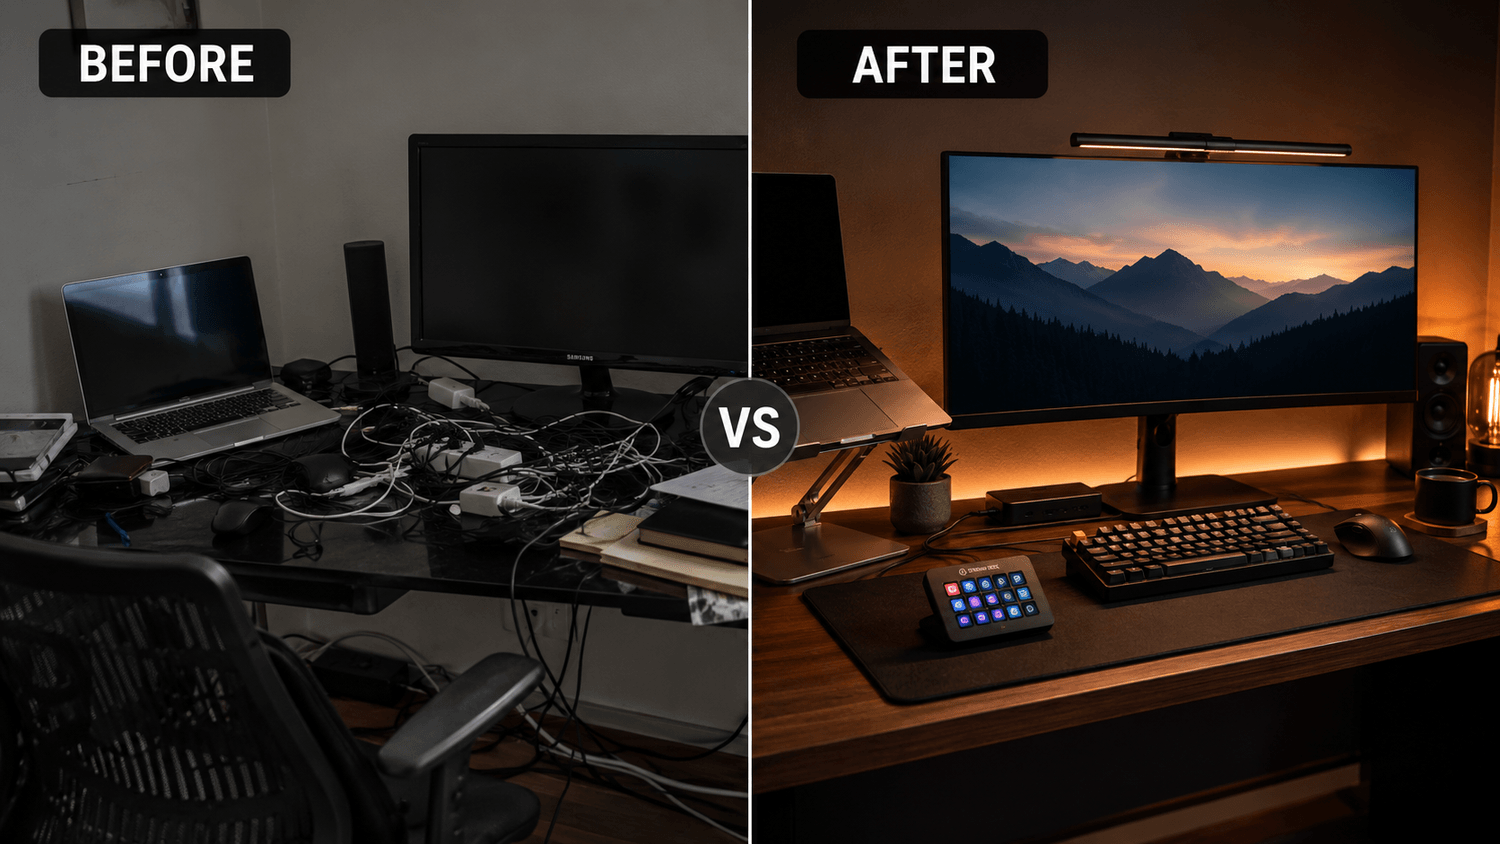
⏩ Before vs After - Was the Desk Upgrade Worth It?
Short answer? Absolutely.
Before this desk makeover, my workspace looked like most “temporary” setups that somehow became permanent. Cables everywhere. Bad lighting. Laptop too low. Tiny annoyances piling up every single day.
After upgrading the setup piece by piece for under $500, my desk finally feels clean, comfortable, and actually enjoyable to use.
And honestly, that changed how I work more than I expected.
Was It Worth Spending Under $500?
For me, yes - easily.
Instead of buying one expensive centerpiece product, I focused on affordable upgrades that solved real problems:
🏁 Conclusion - My Honest Take After Using This Setup
After using this upgraded desk setup for a few weeks, I can honestly say it changed more than just how my workspace looks - it changed how I work every day.
Before this upgrade, my desk felt cramped, distracting, and uncomfortable. Cables were everywhere, lighting was harsh, and I constantly adjusted my posture during long work sessions. The setup technically “worked,” but it never felt inspiring.
Now, the entire workspace feels cleaner, calmer, and far more productive.
📖 Recommended Blogs
Discover the best deals, trending products, and must-have finds.
Categories
Solutions
Smart Solutions Powered by Tools We Trust
Recommended Solutions to Simplify Your Everyday Needs
Handpicked Solutions Backed by Real Results